
Adding a New Site to the Network
The quick and dirty (see next section right below for graphic step by step):
- Download the current chapter, class or parent club template onto your desktop.
- Log on to the network as superadmin (any site on the network gets you there)
- From My Sites – Network Admin – Sites – Add a new site entering the subdomain, site nickname and email address of first administrator
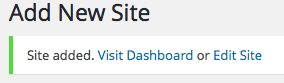
- When site added, Visit Dashboard
- From Tools – Import the template
- From Appearance – Menus – Manage Locations tab, assign the four menus to respective theme locations
- From Settings – General – Change Tagline to the class, chapter or parent club
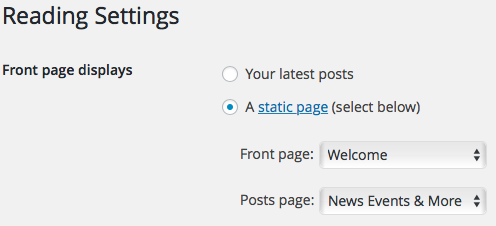
- From Settings – Reading – Change Front Page Displays to a static page, set static pages
- Front Page: Welcome
- Posts page: News & Events
- Widgets – no instructions written, yet… maybe leave this for the site admins?
- Logos – no instructions written, yet… maybe leave this for the site admins?
Graphic Step-by-Step and Styling Guide for Consistency
1. Download the current chapter, class or parent club template onto your desktop.
Note that you will need to RIGHT HAND CLICK to keep the .xls file from opening.
2. Log into the appropriate website network as a superadmin from the top level or any subdomain
Log in link is at the bottom of every page “ADMIN LOG-IN”
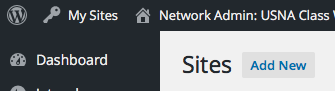
3. Add the new site
From the ![]() pull-down menu, follow to
pull-down menu, follow to ![]() to click on
to click on ![]()
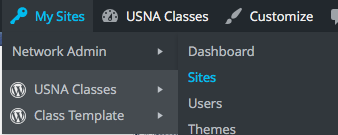
Click on “Add new”
Fill in the three data fields for the new site:
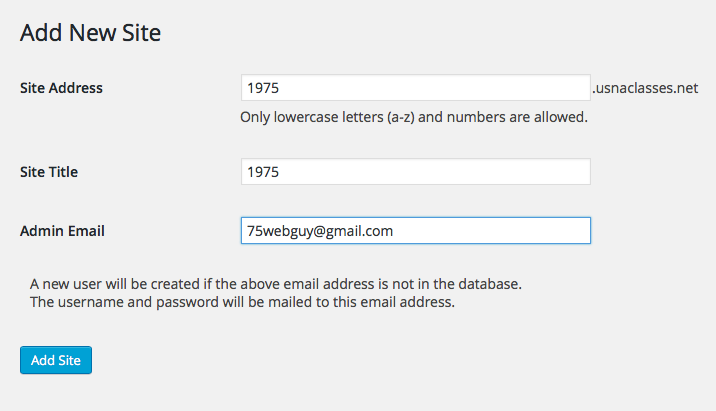
a. Assign Site Address (aka subdomain). For classes, this is the four digit class.
b. Assign a Site Title – aka blogname – use 4 digit class year for classes, for chapters & clubs, best to use a short unique name (such as San Francisco or Philly) – this is not the Tagline which should be the full name of the site (assigned in Settings General – such as “Class of 1985” or “San Francisco Bay Area Chapter”)
c. Assign site Admin Email
- If admin email is not recognized as an existing Network user, a new user will be created. The Network will send the new user an email with log in instructions and a password.
- If admin email belongs to an existing Network user, the user will be granted access and admin role for the new site. The Network will send the new user an email with a log-in link. No password is provided.
d. Click on “Add Site”
4. Now click on Visit Dashboard to setup the site for the users
5. Import the template to pre-populate the site with ready-to-edit structure.
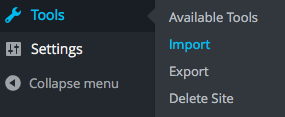
From the new site dashboard, hover over Tools, then click on Import
then click on WordPress ![]() Then select the file just downloaded
Then select the file just downloaded
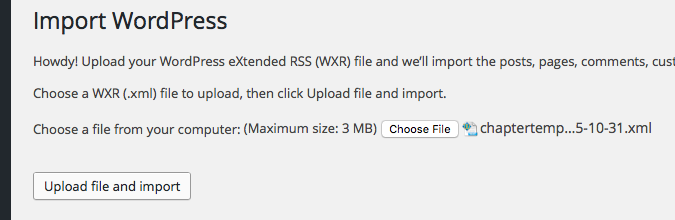
Click on Upload file and import.
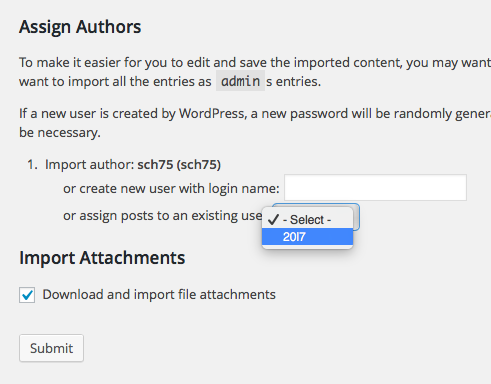
On the next page, make sure you check the box “Download and import file attachments.” You can also assign new posts to the newley created “existing user” or leave it alone, makes no difference.
6. Assigning Menus
Visit the Manage Locations tab from the dashboard, hover over ![]() then click on
then click on ![]()

7. Settings: General
The Tagline is used to display the name of the class, chapter or parent club in the banner. When the site is initially created, the tagline will read Set this Tagline in General Settings.
In Settings: General, change the tagline to the appropriate
8. Settings: Reading
9. Widgets
probably easier to edit these in the widget admin page reached through the Dashboard following through Appearance and clicking on Widgets. See more advice about Widgets
10. The logo
will need to be changed.